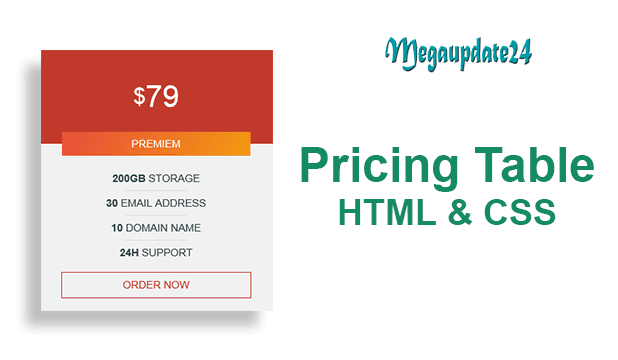
HTML is a markup language which makes any kind of web design structure. It helps to build the website structure and website materials. CSS(Cascading Style Sheets) is a style sheet language for web base software maker.
In this post, I will be showing you how to make a pricing table using only HTML and CSS language with the source code!
Pricing table is an important element of a dynamic website. It helps web publishers to sell any product materials via website or blog. You can make this table without any extra programming language skills. Just follow this tutorial, here I teach you how can you developed a pricing table using HTML & CSS code.
How To Make Pricing Table With Source
So, Let’s see the procedure now:
1. First, you have to install any text editor in your computer program and open it.
2. Now, copy the code and paste it in your text editor file. Save the file in a folder on the desktop with index.html
<!DOCTYPE html>
<html lang=”en” dir=”ltr”>
<head>
<meta charset=”utf-8″>
<title></title>
<link rel=”stylesheet” href=”style.css”>
<meta name=”viewport” content=”width=device-width, initial-scale=1.0″>
</head>
<body>
<div class=”container”>
<div class=”pricing-table table1″>
<div class=”pricing-header”>
<div class=”price”><span>$</span>19</div>
<div class=”title”>Basic</div>
</div>
<ul class=”pricing-list”>
<li><strong>20GB</strong> Storage</li>
<div class=”border”></div>
<li><strong>4</strong> Email Address</li>
<div class=”border”></div>
<li><strong>1</strong> Domain Name</li>
<div class=”border”></div>
<li><strong>24h</strong> Support</li>
</ul>
<a href=”#”>Order Now</a>
</div>
<div class=”pricing-table table2″>
<div class=”pricing-header”>
<div class=”price”><span>$</span>39</div>
<div class=”title”>Pro</div>
</div>
<ul class=”pricing-list”>
<li><strong>60GB</strong> Storage</li>
<div class=”border”></div>
<li><strong>10</strong> Email Address</li>
<div class=”border”></div>
<li><strong>3</strong> Domain Name</li>
<div class=”border”></div>
<li><strong>24h</strong> Support</li>
</ul>
<a href=”#”>Order Now</a>
</div>
<div class=”pricing-table table3″>
<div class=”pricing-header”>
<div class=”price”><span>$</span>79</div>
<div class=”title”>Premiem</div>
</div>
<ul class=”pricing-list”>
<li><strong>200GB</strong> Storage</li>
<div class=”border”></div>
<li><strong>30</strong> Email Address</li>
<div class=”border”></div>
<li><strong>10</strong> Domain Name</li>
<div class=”border”></div>
<li><strong>24h</strong> Support</li>
</ul>
<a href=”#”>Order Now</a>
</div>
</div>
</body>
</html>
*{
margin: 0;
padding: 0;
font-family: “Open Sans”,sans-serif;
text-decoration: none;
list-style: none;
}
body{
min-height: 100vh;
background-image: linear-gradient(125deg,#f29217,#2ecc71);
}
.container{
max-width: 1000px;
margin: auto;
padding: 40px;
display: flex;
flex-wrap: wrap;
}
.pricing-table{
background: #f1f1f1;
flex: 1;
margin: 10px;
text-transform: uppercase;
}
.pricing-header{
color: #fff;
position: relative;
margin-bottom: 20px;
}
.price{
font-size: 40px;
display: flex;
align-items: center;
justify-content: center;
padding: 40px 0;
}
.price span{
font-size: 30px;
}
.title{
position: absolute;
bottom: 0;
left: 50%;
transform: translate(-50%,50%);
width: 80%;
max-width: 360px;
text-align: center;
padding: 8px 0;
font-size: 14px;
}
.pricing-list{
padding: 10px 20px;
}
.pricing-list li{
margin: 8px 0;
font-size: 14px;
color: #344;
text-align: center;
}
.border{
width: 80px;
height: 1px;
background: #ddd;
margin: auto;
}
.pricing-table a{
display: block;
width: 80%;
margin: auto;
margin-bottom: 20px;
text-align: center;
padding: 8px 0;
font-size: 14px;
border: 1px solid;
max-width: 360px;
transition: .2s linear;
}
.pricing-table a:hover{
border-radius: 30px;
}
.table1 .pricing-header{
background: #2980b9;
}
.table2 .pricing-header{
background: #2c3e50;
}
.table3 .pricing-header{
background: #c0392b;
}
.table1 .title{
background-image: linear-gradient(125deg,#3498db,#9b59b6);
}
.table2 .title{
background-image: linear-gradient(125deg,#34495e,#95a5a6);
}
.table3 .title{
background-image: linear-gradient(125deg,#e74c3c,#f39c12);
}
.table1 a{
color: #2980b9;
}
.table2 a{
color: #2c3e50;
}
.table3 a{
color: #c0392b;
}
.table1 a:hover{
background: #2980b9;
color: #fff;
}
.table2 a:hover{
background: #2c3e50;
color: #fff;
}
.table3 a:hover{
background: #c0392b;
color: #fff;
}
@media screen and (max-width:780px) {
.pricing-table{
flex: 100%;
}
}
Read Also:
1. Animated Login Form With HTML
